Compare binary files

Diff is often used to compare two files line by line, but for binary files you must rely on other tools. My favourite tool for this task is dhex: I often use it to analyze data corruptions.

Determine if two binary files are different

You can compute the checksums of the two files and compare them:

$ md5sum good.mp3 bad.mp3
e54c63ad1efe9baea6d44a1ef836146c  good.mp3
933b9d4d4323bf412ee22588db909387  bad.mp3

But since you are not interested in the checksums, it is more simple to invoke diff:

$ diff good.mp3 bad.mp3
Binary files good.mp3 and bad.mp3 differ

However, a better alternative is to use cmp because it tells you where the difference starts:

$ cmp good.mp3 bad.mp3
good.mp3 bad.mp3 differ: char 3527361, line 17610

View differences between binary files

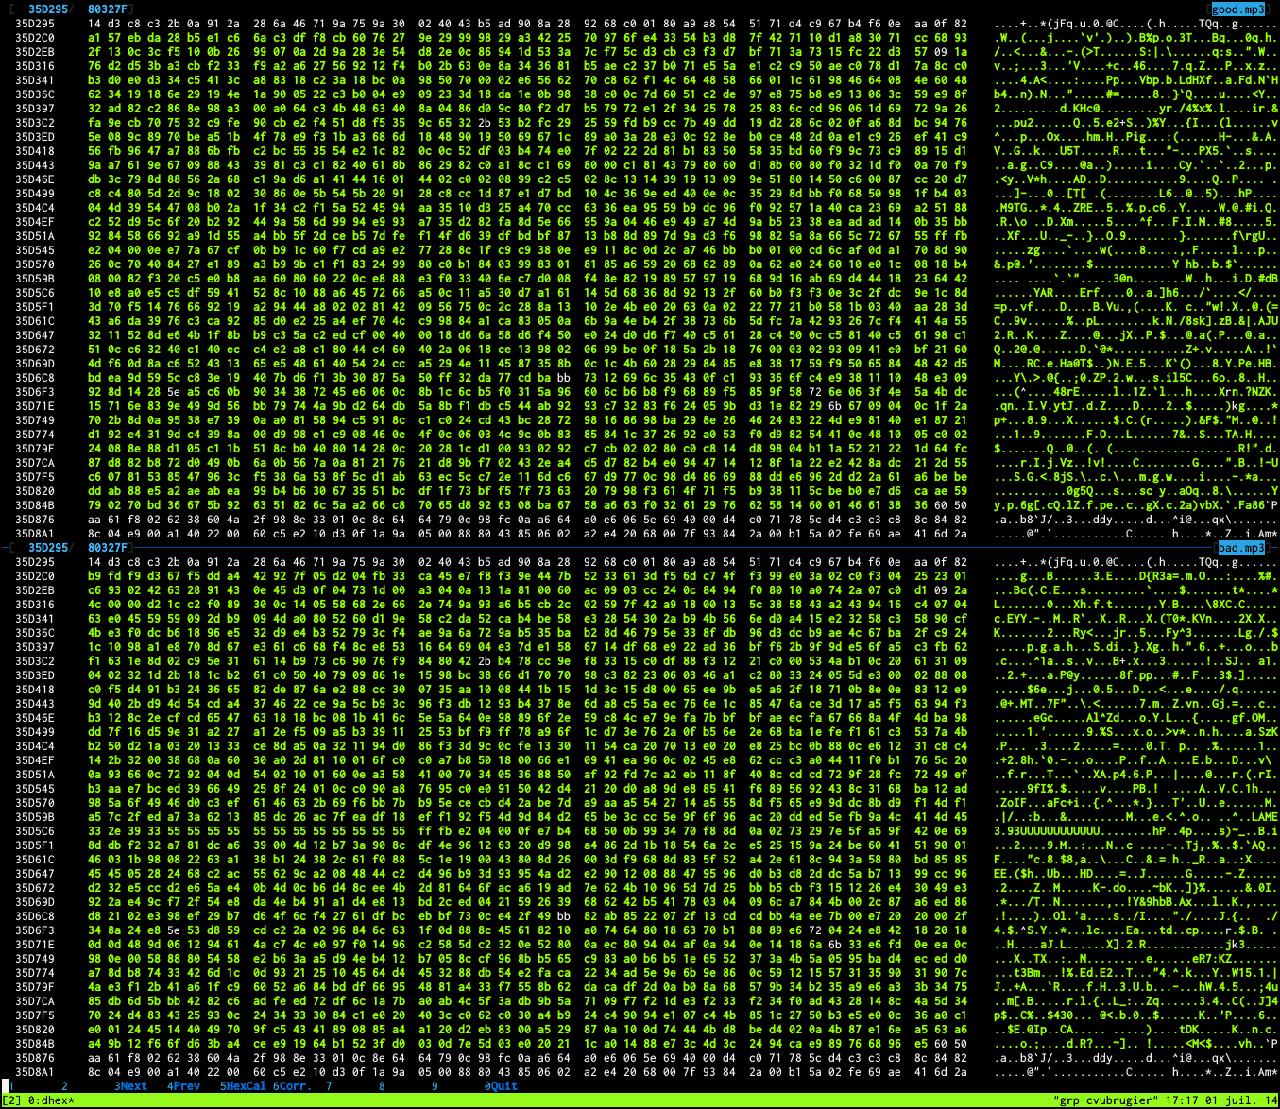
dhex is an hexadecimal editor but its most convenient feature in my opinion is the diff mode. To enter the diff mode, you have to invoke dhex with two files as parameters:

$ dhex good.mp3 bad.mp3

Then to jump to the first difference, you can press F3.

dhex showing differing bytes between two binary files

Decode segfault errors in dmesg

You are writing a C program. You build it. You run it.

$ ./foo
Segmentation fault

The machine hardly reminds you that you are human. But before rushing to re-compile your program with debugging symbols or adding printf() calls here and there, have a look at the output of the Linux kernel:

$ dmesg
foo[1234]: segfault at 2a ip 0000000000400511 sp 00007fffe00a3260 error 4 in foo[400000+1000]

There are some hints in the output of dmesg:

  • foo is the executable name
  • 1234 is the process ID
  • 2a is the faulty address in hexadecimal
  • the value after ip is the instruction pointer
  • the value after sp is the stack pointer
  • error 4 is an error code
  • the string at the end is the name of the virtual memory area (VMA)

The error code is a combination of several error bits defined in fault.c in the Linux kernel:

/*
 * Page fault error code bits:
 *
 *   bit 0 ==    0: no page found       1: protection fault
 *   bit 1 ==    0: read access         1: write access
 *   bit 2 ==    0: kernel-mode access  1: user-mode access
 *   bit 3 ==                           1: use of reserved bit detected
 *   bit 4 ==                           1: fault was an instruction fetch
 *   bit 5 ==                           1: protection keys block access
 *   bit 6 ==                           1: shadow stack access fault
 *   bit 15 =                           1: SGX MMU page-fault
 */
enum x86_pf_error_code {
        X86_PF_PROT     =               1 << 0,
        X86_PF_WRITE    =               1 << 1,
        X86_PF_USER     =               1 << 2,
        X86_PF_RSVD     =               1 << 3,
        X86_PF_INSTR    =               1 << 4,
        X86_PF_PK       =               1 << 5,
        X86_PF_SHSTK    =               1 << 6,
        X86_PF_SGX      =               1 << 15,
};

Since you are executing a user-mode program, X86_PF_USER is set and the error code is at least 4. If the invalid memory access is a write, then X86_PF_WRITE is set instead. Thus:

  • If the error code is 4, then the faulty memory access is a read from user space.
  • If the error code is 6, then the faulty memory access is a write from user space.

Moreover, the faulty memory address in dmesg can help you identify the bug. For instance, if the memory address is 0, the root cause is probably a NULL pointer dereference.

The name of the VMA may indicate the location of the error:

#include <stdlib.h>

int main(void)
{
        free((void *) 42);
        return 0;
}

When executed, the program above triggers a segfault and the VMA name is libc. Maybe a function from libc was called with a pointer no longer valid.

progname[1234]: segfault at 22 ip 00007f6b2531473c sp 00007ffc7b2c5c30 error 4 in libc-2.31.so[7f6b252af000+14b000]

The fault handler is architecture dependent, so you will not observe the same messages in dmesg with other architectures than x86. For instance, on ARM no message is displayed unless the Linux kernel has been built with CONFIG_DEBUG_USER.

Fondation Louis Vuitton

A 64-bit 64-beam architecture
Fondation Louis Vuitton

Install an iSNS server on OpenIndiana

In order to test target-isns, an iSNS client that I am developing, I looked for an iSNS server running on Linux. Unfortunately, the iSNS server implementations for Linux that I found (linuxisns and Open-iSNS) are not maintained anymore.

It seems that people managing iSNS servers these days are using Windows or Solaris. That's why I decided to install OpenIndiana, an operating system derived from OpenSolaris, to try Solaris' iSNS server.

Install OpenIndiana

OpenIndiana is a distribution of Illumos, the open source fork of Sun's OpenSolaris. Installing the server version of OpenIndiana is quick and easy: the installation completes in less than fifteen minutes. Then it is time to execute a first command:

$ uname -a
SunOS openindiana 5.11 oi_151a8 i86pc i386 i86pc Solaris

As you can see, this is not Linux ☺. When I was a student ten years ago, I used to work on an Ultra 5 workstation and at the time I felt frustrated by Solaris' command-line utilities which were less convenient than the GNU utilities. Fortunately, OpenIndiana enables the Bash interpreter and the GNU utilities by default.

$ echo $SHELL
/bin/bash
$ echo $PATH
/usr/gnu/bin:/usr/bin:/usr/sbin:/sbin

Moreover, OpenIndiana allows remote login with SSH and the user specified during installation is a sudoer.

Install the iSNS server

That's where things start to differ from Linux: packages are managed by the pkg command, not apt or yum. To search for a package, you can use the pkg search command:

$ pkg search isns
INDEX       ACTION VALUE                                PACKAGE
pkg.summary set    Solaris iSNS Server                  pkg:/service/storage/isns@0.5.11-0.151.1.8
basename    file   usr/sbin/isns                        pkg:/service/storage/isns@0.5.11-0.151.1.8
pkg.fmri    set    openindiana.org/service/storage/isns pkg:/service/storage/isns@0.5.11-0.151.1.8

Then, the pkg install command is executed to install the iSNS package.

$ sudo pkg install isns
           Packages to install:  1
       Create boot environment: No
Create backup boot environment: No
            Services to change:  1

Enable the iSNS service

After installing the iSNS server, you will see that it is not running. This is because the iSNS service must be enabled.

The services of OpenIndiana are managed with the svc family of commands. For instance, svcs displays the list of services that are running.

$ svcs
STATE          STIME    FMRI
legacy_run     18:09:16 lrc:/etc/rc2_d/S20sysetup
legacy_run     18:09:16 lrc:/etc/rc2_d/S47pppd
[...]
online         18:10:13 svc:/system/console-login:default
online         18:39:07 svc:/system/manifest-import:default

If you want to display all services, including the services that are not running, you have to pass the -a option to svcs:

$ svcs -a | grep isns
disabled       18:39:05 svc:/network/isns_server:default

As you can see, the iSNS service is not running. Let's enable it with the svcadm command:

$ sudo svcadm enable svc:/network/isns_server
$ svcs svc:/network/isns_server
STATE          STIME    FMRI
online         18:59:37 svc:/network/isns_server:default

That's it! Our iSNS server is now up and running:

$ ps aux | grep isns
root      2127  0.0  0.2 4712 2352 ?        S 18:59:37  0:00 /usr/sbin/isns
Upgrade the CPU microcode on Debian

When looking at your system's logs, you may notice the following advice in the Linux kernel logs:

perf_event_intel: PEBS disabled due to CPU errata, please upgrade microcode

If you are running Debian, you just have to install two packages to fix the problem: intel-microcode and iucode-tool. With these packages installed, the Linux kernel automagically upgrades the microcode during the boot sequence.

microcode: CPU0 sig=0x206a7, pf=0x10, revision=0x23
platform microcode: firmware: agent loaded intel-ucode/06-2a-07 into memory
microcode: CPU0 sig=0x206a7, pf=0x10, revision=0x23
microcode: CPU0 updated to revision 0x28, date = 2012-04-24

Now that the CPU microcode is up-to-date on your computer, let's see what microcode is and why it matters.

What is microcode?

Software has bugs. Hardware has bugs too. However, it is easier to fix a software bug than a hardware design defect in a CPU because software can be updated whereas a CPU must be replaced.

Intel documents its design defects and errors as errata. Upgrading the CPU's microcode can fix some of these problems.

Microcode is a very low-level construct: it is a program that defines the control logic of the CPU. As such, microprogramming is lower-level than assembly programming. You can consider the assembly language instruction set as the CPU's API which is publicly documented whereas the microcode defines the implementation of an instruction for a specific CPU. Moreover, Intel's microcode is mostly a black box and only Intel's engineers have enough knowledge to write it.

The BIOS or EFI firmware often update the CPU microcode. But for many computers, vendors do not supply new firmware. Fortunately, the operating system can update the microcode itself. It has to apply the update at every boot because the new microcode is lost after a CPU hard reset.

For more information about Intel's microcode, you can read:

Install the Tizen SDK on Debian

Updated July 2013: the Tizen project has released the Tizen SDK 2.2. When installing the SDK on a distribution other than Ubuntu, the installer does not complain that the distribution is unsupported. As a consequence, the changes described here are no longer necessary.

Updated May 2013: the Tizen project has released the Tizen SDK 2.1. Linux support is still limited to Ubuntu but I have updated the patch for Debian.

The Tizen project has released version 2.0 of its software development kit in mid february. The Tizen SDK is available for Mac OS X, Windows and Linux. Unfortunately, Linux support is limited to Ubuntu.

Maintaining software and ensuring that it works on several Linux distributions has a cost. However, I think it is a bit contradictory for Tizen to aspire to compete with three mobile OSes (iOS, Androïd, and Windows Phone) while supporting no more than three platforms for its SDK.

Fortunately, it is quite easy to install the Tizen SDK on Debian 7.0 "Wheezy". Here is how.

The SDK, which can be downloaded there, is a self-extracting archive: a tarball is appended to a shell script:

$ head -n 1 tizen-sdk-ubuntu64-v2.1.4.bin
#!/bin/bash
$ tail -n +130 tizen-sdk-ubuntu64-v2.1.4.bin | tar zt
InstallManager
InstallManagerP
InstallManager.jar
installmanager.conf

In order to add support for Debian or your favorite Linux distribution, the install script has to be modified. The script reads the content of /etc/lsb-release, but this file is missing from Debian. Instead, the lsb_release should be invoked.

Here is a patch for the Tizen SDK installer that adds support for Debian Wheezy:

--- tizen-sdk-ubuntu64-v2.1.4.bin   2013-05-28 23:04:57.073651552 +0200
+++ tizen-sdk-ubuntu64-v2.1.4.bin   2013-05-28 23:12:55.405631436 +0200
@@ -1,7 +1,7 @@
 #!/bin/bash

 ORI_FILE_md5sum="80064b2d0c0e3e5a921471e5c500d981"
-ORI_FILE_LEN="130"
+ORI_FILE_LEN="141"

 TPUT="`which tput`"
 if test -t 0 -a -t 1 -a -n "$TPUT"; then
@@ -16,7 +16,8 @@

 OS_BLOCKSIZE=`df -k . |head -n 1 | awk '{if ( $4 ~ /%/) { print $1 } else { print $2 } }'`
 OS_BIT=`getconf LONG_BIT`
-OS_VERSION=`cat /etc/lsb-release | grep DISTRIB_RELEASE | awk -F= '{print $2}'`
+DISTRIB_ID=`lsb_release --short --id`
+DISTRIB_RELEASE=`lsb_release --short --release`

 JAVA_VERSION=`java -version 2>&1 | sed -n "/^java version/p"`
 JAVA_BIT_FLAG=`java -version 2>&1 | egrep -e 64-Bit`
@@ -36,14 +37,25 @@
 INSTALLATION_CHECK="procps gettext libdbus-1-3 libcurl3 expect gtk2-engines-pixbuf grep zip make libgnome2-0"
 pkg_list=""

-# ubuntu version 10.x and 11.x and 12.x and 32bit
-if [ "10.04" = ${OS_VERSION} ] || [ "10.10" = ${OS_VERSION} ]; then
-   INSTALLATION_CHECK="$INSTALLATION_CHECK qemu-arm-static"
-elif [ "11.04" = ${OS_VERSION} ] || [ "11.10" = ${OS_VERSION} ]; then
-   INSTALLATION_CHECK="$INSTALLATION_CHECK qemu-user-static"
-elif [ "12.04" = ${OS_VERSION} ] || [ "12.10" = ${OS_VERSION} ]; then
-   INSTALLATION_CHECK="$INSTALLATION_CHECK qemu-user-static libwebkitgtk-1.0-0"
-fi
+case "${DISTRIB_ID}" in
+   Debian)
+       if [ "${DISTRIB_RELEASE}" = '7.0' ]; then
+           INSTALLATION_CHECK="$INSTALLATION_CHECK qemu-user-static libwebkitgtk-1.0-0"
+       fi
+       ;;
+   Ubuntu)
+       if [ "${DISTRIB_RELEASE}" = '10.04' ] || [ "${DISTRIB_RELEASE}" = '10.10' ]; then
+           INSTALLATION_CHECK="$INSTALLATION_CHECK qemu-arm-static"
+       elif [ "${DISTRIB_RELEASE}" = '11.04' ] || [ "${DISTRIB_RELEASE}" = '11.10' ]; then
+           INSTALLATION_CHECK="$INSTALLATION_CHECK qemu-user-static"
+       elif [ "${DISTRIB_RELEASE}" = '12.04' ] || [ "${DISTRIB_RELEASE}" = '12.10' ]; then
+           INSTALLATION_CHECK="$INSTALLATION_CHECK qemu-user-static libwebkitgtk-1.0-0"
+       fi
+       ;;
+   *)
+       echo "${CE} Unsupported distribution: ${DISTRIB_ID} ${CN}"
+   ;;
+esac

 NVIDIA_CHECK=`lspci | grep nVidia`
 MESA_CHECK=`dpkg -l | egrep -e libgl1-mesa-glx' '`
@@ -65,8 +77,7 @@
 ## check the default java as OpenJDK ##
 CHECK_OPENJDK=`java -version 2>&1 | egrep -e OpenJDK`
 if [ -n "${CHECK_OPENJDK}" ] ; then
-   echo "${CE} OpenJDK is not supported. Try again with Oracle JDK. ${CN}"
-   exit 1
+   echo "${CE} Warning: Oracle JDK is preferred over OpenJDK. ${CN}"
 fi

 ## check the java installation ##
@@ -95,7 +106,7 @@
 fi

 ## check the mesa driver for emulator ##
-if [ "10.10" = ${OS_VERSION} ] && [ -n "${NVIDIA_CHECK}" ] && [ -z "${MESA_CHECK}" ] ; then
+if [ ${DISTRIB_RELEASE} = '10.10' ] && [ -n "${NVIDIA_CHECK}" ] && [ -z "${MESA_CHECK}" ] ; then
    echo "We recommend that you use the Mesa OpenGL implementation in Ubuntu 10.10 and nVidia enviroment."
    echo "Please install${CE} libgl1-mesa-glx ${CN}package."
    exit 1

The original installer verifies that the Java virtual machine from Oracle is present. However, the SDK seems to work pretty well with OpenJDK. So I decided to disable the check for Oracle's JVM.